Waking Up Your AC After Its Winter Nap 
Hey there, fellow homeowners! As I was sweating through my spring cleaning last weekend, I realized it was finally time to kick my air conditioner back into gear after its long winter hibernation. If you’re like me, you might be tempted to flip the switch and hope for the best but trust me, I’ve learned the hard way that a little TLC now can save you from a sweaty, miserable breakdown when temperatures start to soar.
After 10+ years in my home (and three AC repairs that could have been prevented), I’ve developed a pretty solid routine for waking up my cooling system. Let me walk you through what I’ve learned, both from my own mistakes and from picking the brains of every HVAC technician who’s ever set foot in my house!
Why Your AC Needs Some Love After Winter
Think about it, your air conditioner has been sitting unused for months, collecting dust, possibly getting visit by critters, and generally just feeling neglected. Just like your car would struggle if you left it sitting in the garage all winter, your AC needs a bit of attention before it can perform at its best.
Last year, I skipped my usual spring AC check because we had a mild start to summer. Big mistake! When that first 95-degree day hit in June, my system struggled to keep up, my energy bill shot through the roof, and the house never quite got comfortable. Let’s make sure that doesn’t happen to you!
My Step-by-Step AC Revival Process
1. Start with a Thermostat Check
This might seem obvious, but I always begin by making sure my thermostat is working properly. I switch it to “cool” mode and set it about 5 degrees below the current room temperature. Then I listen carefully there should be a click or hum as the system kicks on. Last spring, I spent an hour troubleshooting my “broken” AC before realizing the thermostat batteries were dead. Talk about a facepalm moment!
2. Give That Filter Some Attention
If there’s one thing every HVAC tech has drilled into my head, it’s the importance of clean filters. I now keep a reminder in my phone to check mine regularly, but especially before starting up the AC for the season.
Pull out your filter and hold it up to the light—if you can’t see through it, it’s time for a new one. A clogged filter is like trying to breathe through a pillow; your AC will struggle, use more energy, and possibly even damage itself trying to push air through.
3. Show Your Outdoor Unit Some Love
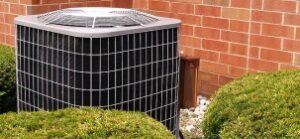
My outdoor condenser unit sits under some trees in the backyard, which means it collects its fair share of leaves, twigs, and other debris during the off-season.
I take about 15 minutes to:
- Clear away any leaves or branches within a 2-foot radius
- Gently clean the outside of the coils (I use a soft brush and the garden hose on a gentle setting)
- Check for any obvious damage to the unit or the coolant lines
One year I found that a family of mice had made a cozy winter home inside my unit! Needless to say, that required professional intervention.
4. Check Your Electrical Connections
If your AC won’t turn on at all, the circuit breaker is the first place to look. I’ve had mine trip during winter storms without noticing. Simply locate your electrical panel, find the switch labeled for your AC (usually a double switch), and make sure it’s in the “on” position.
If it keeps tripping after you reset it, that’s your AC’s way of crying for help—time to call in a pro before you do any damage.
5. Inspect Those Refrigerant Lines
The insulated copper pipes that run from your outdoor unit to your home should be intact and free from damage. I learned about this the hard way after a neighborhood dog chewed through my line’s insulation one winter, leading to efficiency issues the following summer.
Look for any signs of:
- Ice buildup (even on a hot day)
- Oily residue or wet spots around the connections
- Missing or damaged insulation
These could indicate a refrigerant leak, which is definitely in “call the professionals” territory.
6. Test Your Airflow
Once everything looks good visually, I run a simple airflow test. I turn on the system, then go around to every vent in the house with a piece of toilet paper. The paper should be pulled toward the vent if it’s a return or pushed away if it’s a supply vent.
If airflow seems weak or some rooms are getting more air than others, you might have duct issues that need addressing.
7. Use Your Ears
During the first run of the season, I like to just sit and listen to my AC for a few minutes. Over time, you get to know what your system normally sounds like—which means you’ll notice when something changes.
Normal sounds include:
A gentle humming
- Clicks when the system turns on and off
- The whoosh of air through the vents
- Abnormal sounds that make me reach for the phone include:
- Grinding or screeching
- Persistent rattling or banging
- Any loud, sudden noises
8. Run a Full Test Cycle
Finally, I let my system run through a complete cycle—turning on, cooling the house, and shutting off automatically when it reaches the set temperature. This usually takes about 20-30 minutes. If it runs continuously without shutting off or turns on and off frequently (short cycling), something’s not right.
When I Know It’s Time to Call for Backup
While I’m all for DIY maintenance, there are certain problems I don’t mess with.
Here’s when I pick up the phone for professional help:
- If my AC doesn’t turn on at all after checking the obvious (thermostat, breaker)
- When the air coming out of the vents feels warm after running for 15+ minutes
- If I hear unusual noises that don’t resolve after checking for loose parts
- When there’s any smell of burning or electrical issues
- If I see water pooling around indoor components
- When my energy bills suddenly spike without explanation
I used to put off making these calls, hoping the problem would magically fix itself. Spoiler alert: it never did, and waiting usually just made the eventual repair more expensive!
What to Expect from a Professional Tune-Up
When I do schedule my annual professional maintenance (which I now faithfully do every spring), here’s what typically happens:
The technician does a comprehensive check that includes:
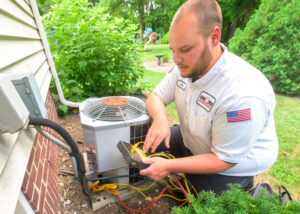
- Testing electrical components and connections
- Cleaning the evaporator and condenser coils thoroughly
- Checking and adjusting refrigerant levels if needed
- Lubricating all moving parts
- Inspecting and cleaning the condensate drain
- Checking ductwork for leaks or blockages
- Testing the thermostat calibration
This usually takes about an hour, and the peace of mind is absolutely worth it.
Quick Answers to Questions I Used to Have
Can I just turn on my AC without any prep?
You can, but it’s like going for a 10-mile run after sitting on the couch all winter—technically possible, but not recommended and potentially harmful.
How do I know if my system needs more refrigerant?
If your AC runs constantly but barely cools, or if you see ice forming on the refrigerant lines, these could be signs. But remember, refrigerant doesn’t just “get used up”—if it’s low, there’s a leak that needs repair.
Is that musty smell normal when I first turn on the AC?
A brief dusty smell is normal as the system pushes out winter dust. If it persists or smells moldy, your system might need a deeper cleaning.
Remember, a little preventative care now means comfortable, worry-free cooling all summer long. Stay cool, friends!
Have you started prepping your AC for summer yet? Or are you dealing with an AC issue I didn’t cover?
